Hi All,
Ever have the need to save the current state of certain outputs, to recall at another time?
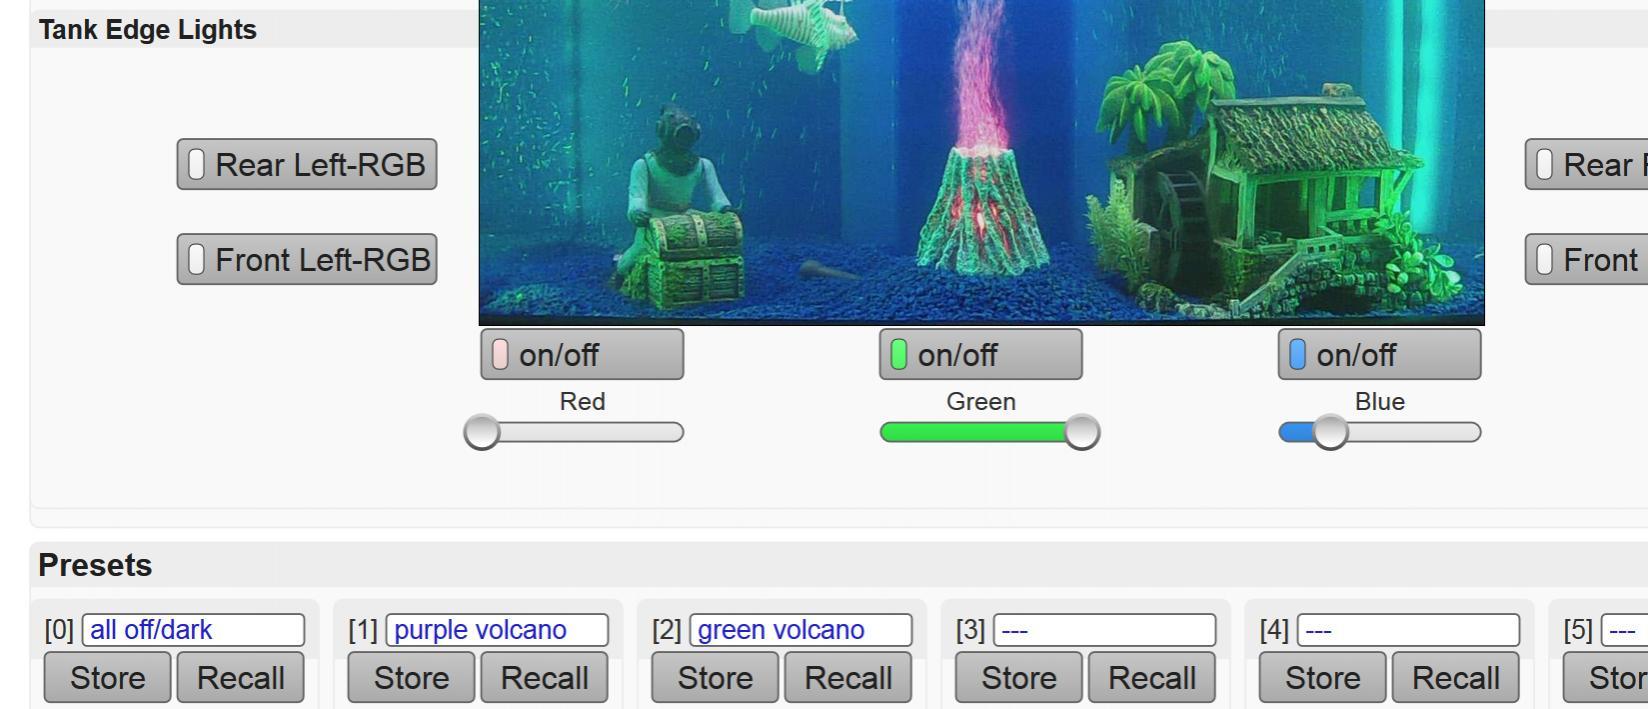
For example, we have a nifty groov Demo which involves a fish tank that’s lit and animated using an assortment of digital and analog outputs. To put the tank in a particular state, say, “party mode” perhaps, or “green volcano” in the case pictured, I wrote a looping chart, attached below (import into any 9.3 or newer PAC Control strategy).
I use the pointer table (called ptScenePoints) essentially as the list of outputs I’m going to store or recall for each “scene.” I also have 3 more tables where each index corresponds to a particular scene number.
First is a string table called stSceneNames which is just a label for each scene. In the image, I’ve named the first three (scenes 0, 1, and 2) to be “all off/dark” or “purple volcano” or “green volcano.”
Next I have a float table called ftSceneOutputValues. Since each scene can have many values, I’m leaving room for up to 100 by have scene 0’s settings start at 0, scene 1 starts at 100, 2 and 200, etc.
Finally, a set of scene states (a Numeric Table) called stSceneState where a scene’s value of 0 is the normal (nothing happening); 1 is what the HMI will sent to say: “save settings” (cleared when done by the chart); and 2 means “recall settings” (also cleared when done).
Below I’ve attached the looping logic which appropriately updates these various tables.
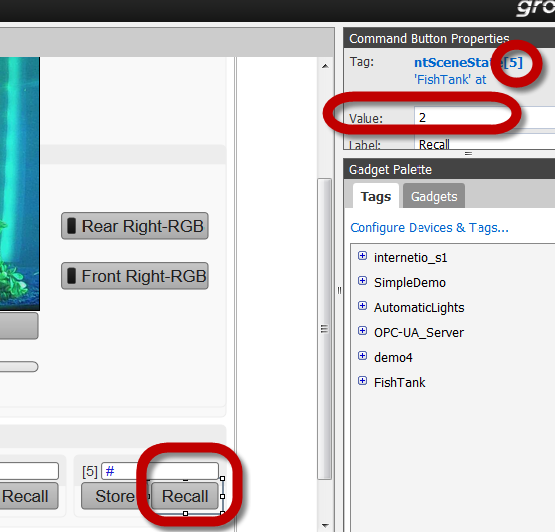
To hook this up to the HMI of your choice (e.g. groov shown here), you just need 2 buttons and one text input for each scene you’ll allow the user to name, store, and recall. The name is just hooked to the string table stSceneNames[X], the Store button will send a 1 to ntSceneState[X] and the Recall button sends 2 (also to ntSceneState[X]), as pictured below for [5]:
To use it, you can name a scene, get all your outputs set to correspond to that mood/preset, and press “Store.”
For my first scene, I created one with everything off (perhaps the state I’d what to “Recall” when I’m walking out the door). That also helps for testing other scenes. I can do a “Store” of a new party mode. Then “Recall” the off state, then “Recall” my new party mode and see everything go!
Be sure to always groov and party responsibly, of course. 
-OptoMary
Here’s the chart to import:
StoreRecallR9_3Basic.zip (3.92 KB)