One of the cool things about Node-RED is that your options are always expanding. As developers add new Nodes to connect to new and different services and devices, you can add those Nodes to your Node-RED install very quickly and easily. Here’s how…
[Note. Your Node-RED instance must be connected to the Internet for this process to work.]
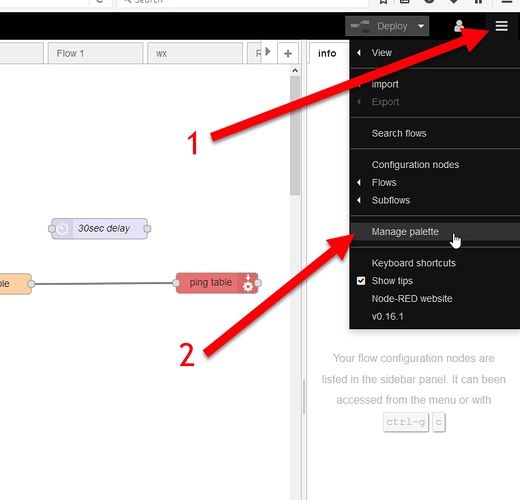
From the menu button (the three white stripes that look like a hamburger) on the top right of your Node-RED webpapge, click on ‘Manage palette’.
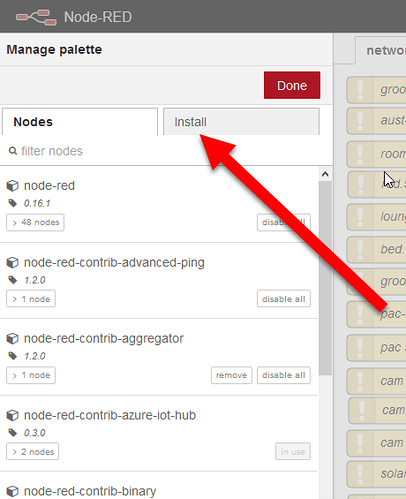
This will change the palette menu on the left of your layout.
From this new menu you can see what Nodes you currently have installed and you can install new Nodes.
To find new Nodes, click on the ‘Install’ tab (just under the red ‘Done’ button).
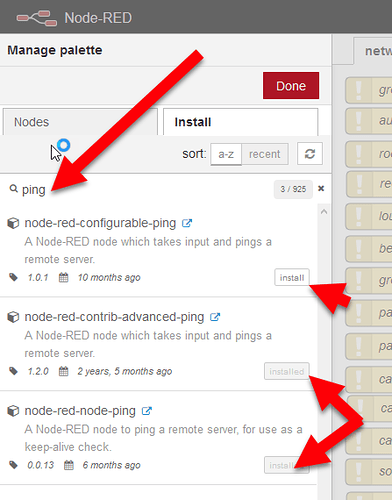
There you can do a search for what you think the Node might be called. For the most part, they are pretty sensibly named. You are probably going to find the Node you are looking for, or not. Not every bit of software as a service or hardware has Node-RED Nodes built yet for them.
If you find what you want, click on the ‘Install’ button for that Node and wait till it is installed.
In this screen shot, I have done a search for ‘ping’ and you can see that I have two different Ping nodes already installed and one not installed.
To help you get a sense of what is out there, you can visit the Node-RED Node and Flow page here; http://flows.nodered.org/
From this page, uncheck the ‘Flows’ check box when you do a search so only the Nodes are displayed for you.
(We will talk about the Flows in another post).
As you can see, there are a lot of existing Nodes and more being added pretty frequently.
If you are into the Twitter thing, you can follow https://twitter.com/red_nodes (@red_nodes) and get a Tweet every time a new Node is added to the library. (@NodeRED for their main feed).


