Got it working.
Thanks for your patience, always a lot going on Opto HQ.
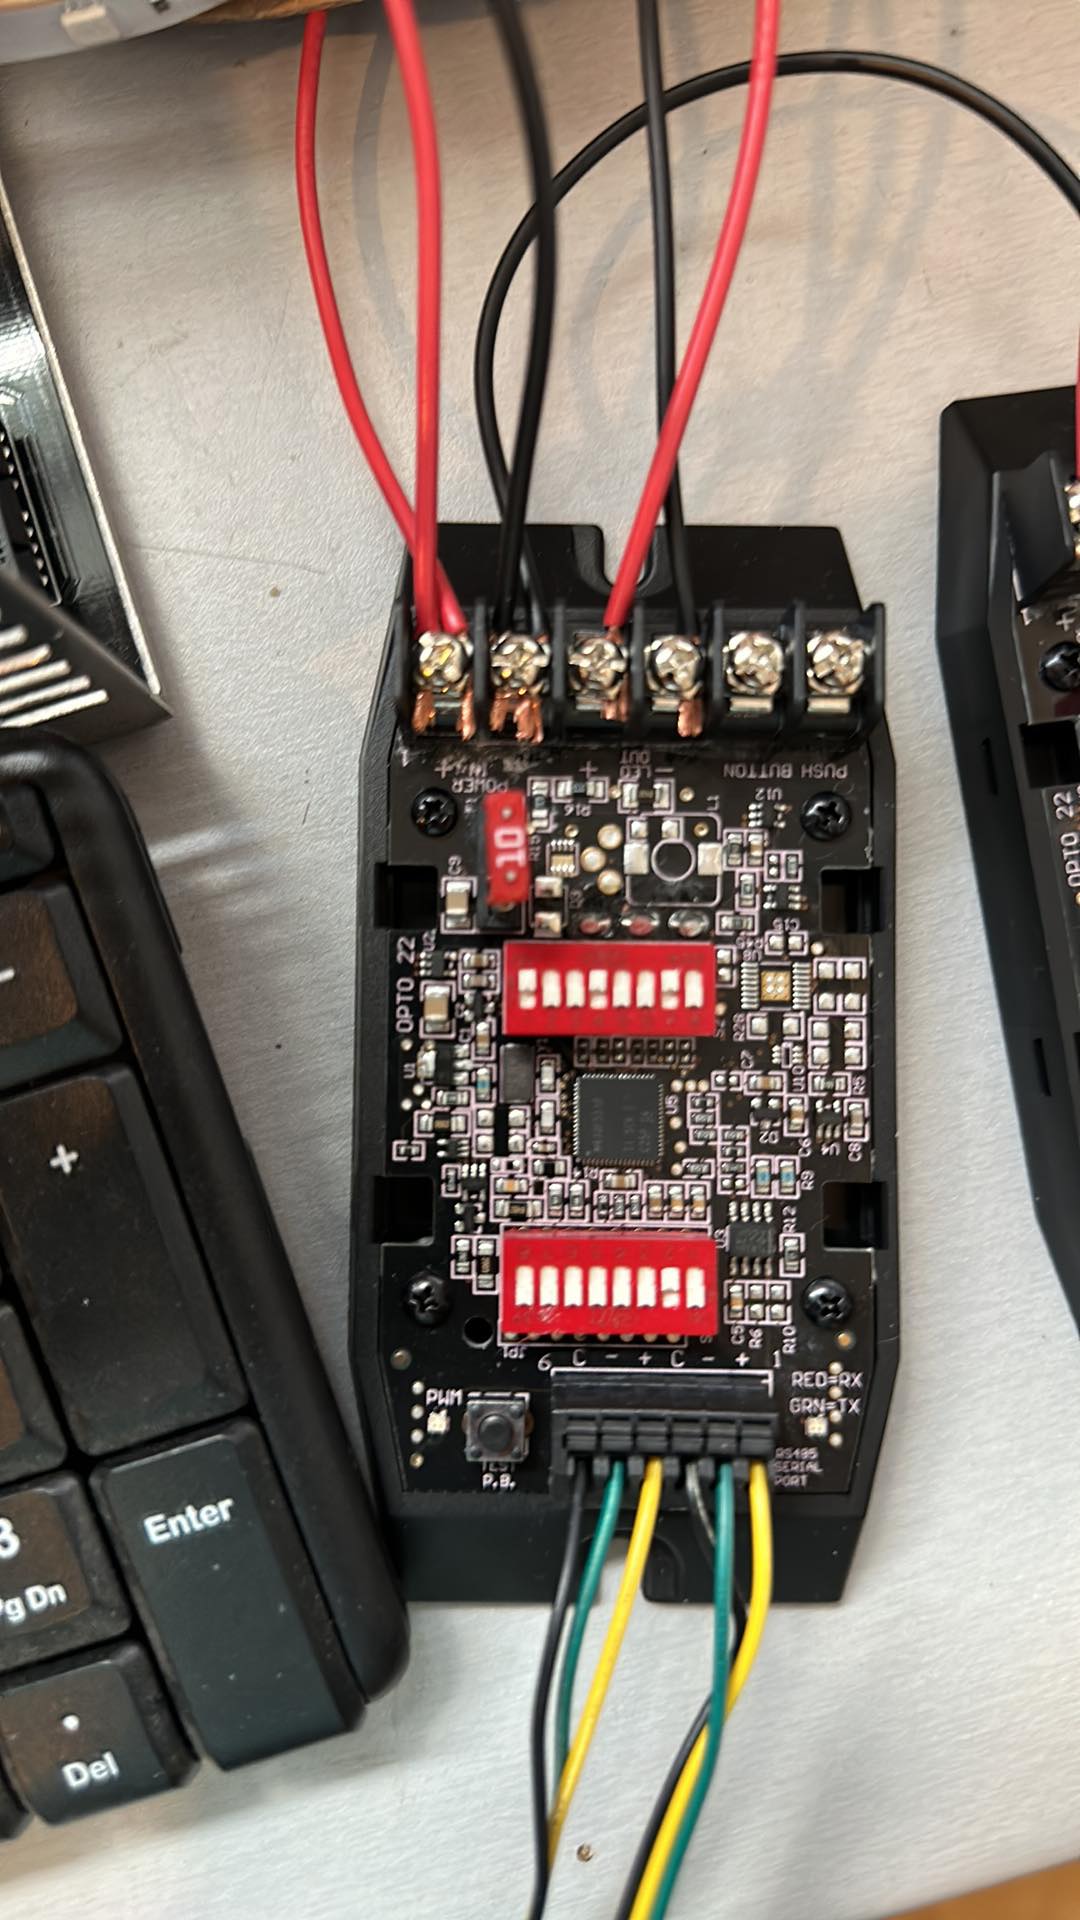
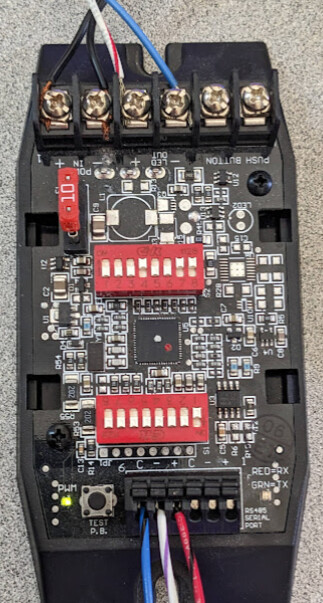
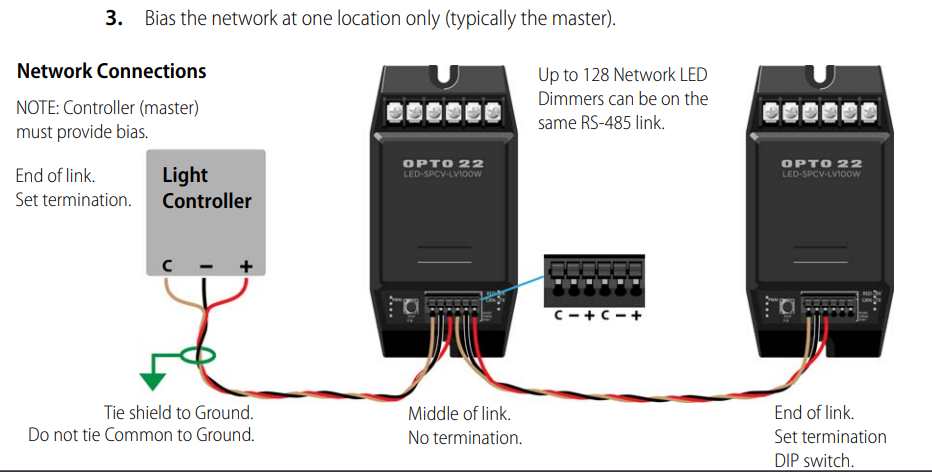
Ok, from the dimmer backwards…
Just set it up like this and slowly expand as you need that way you know when something stops working.
No parity, 9600 baud, Modbus, terminated (if this dimmer is at the end of loop, not terminated if it is not).
Address 1.
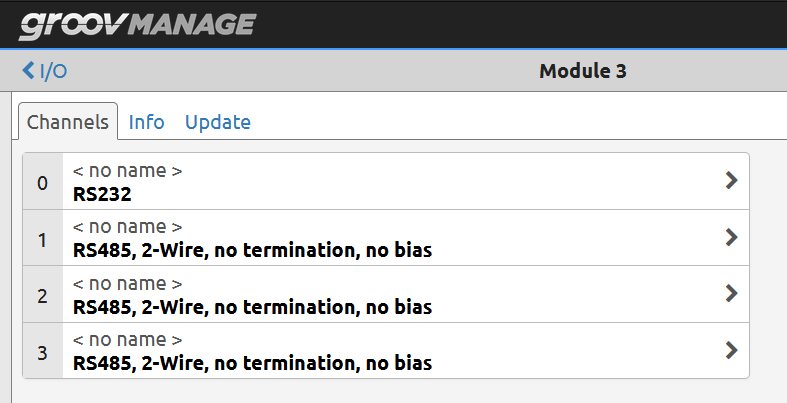
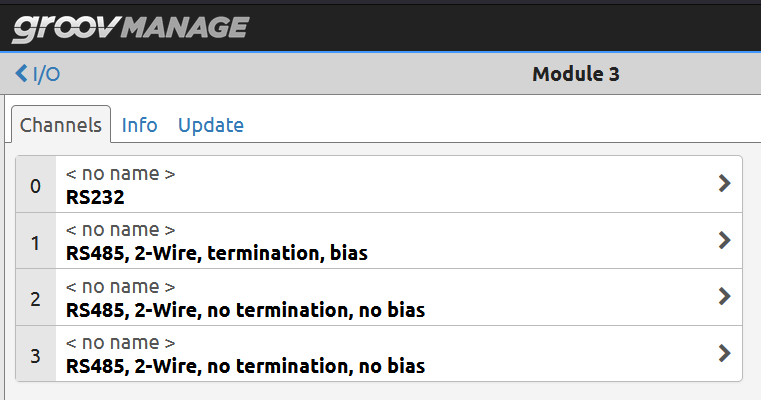
On the serial module…
I’m using port 1 as I have some RS232 stuff in port 0.
No termination if your EPIC is in the middle of the dimmer loop.
Or turn termination on if it is at the end.
(For this simple test, it does not really matter - same with bias, for a short length of wire, bias and termination are not go/no-go settings).
Don’t forget to set all this via groov Manage as Node-RED will not configure the port.
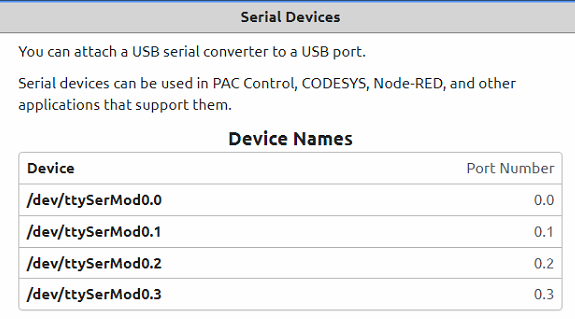
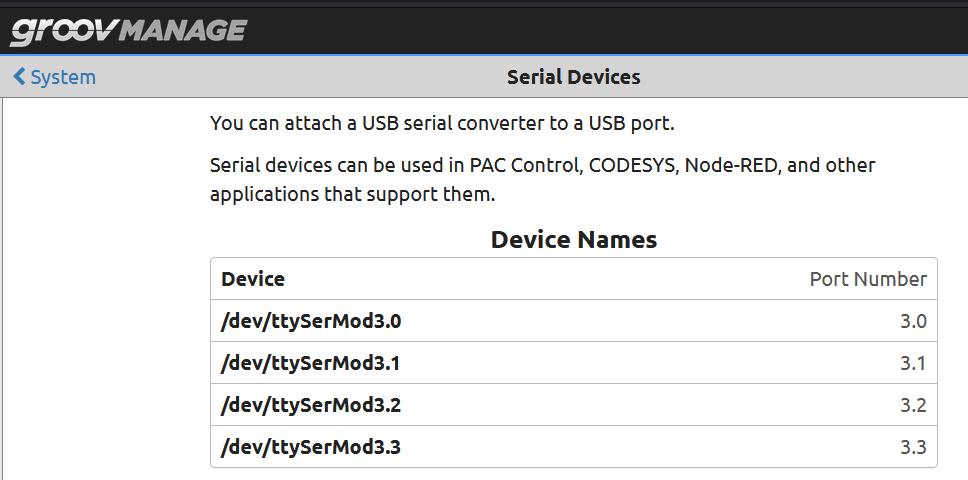
The EPIC serial module port naming is important.
Make a note from groov Manage what your port names are.
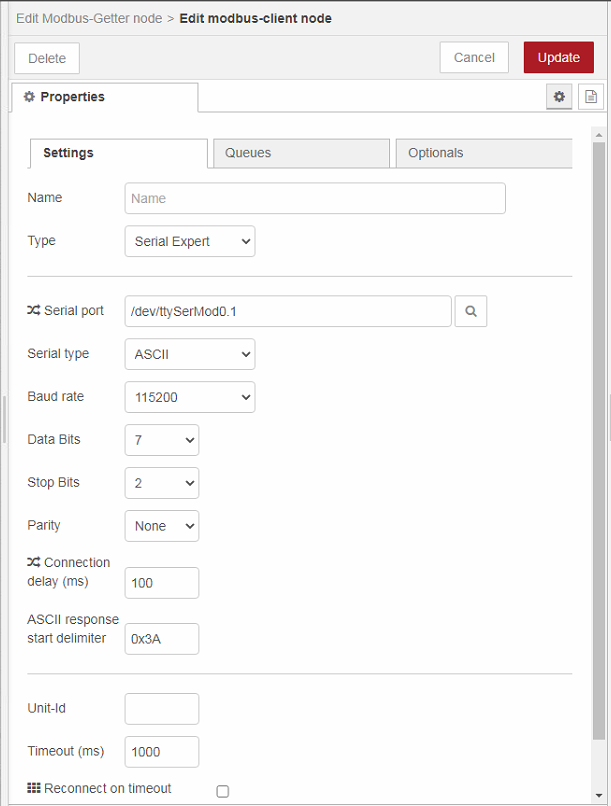
Now the Node-RED.
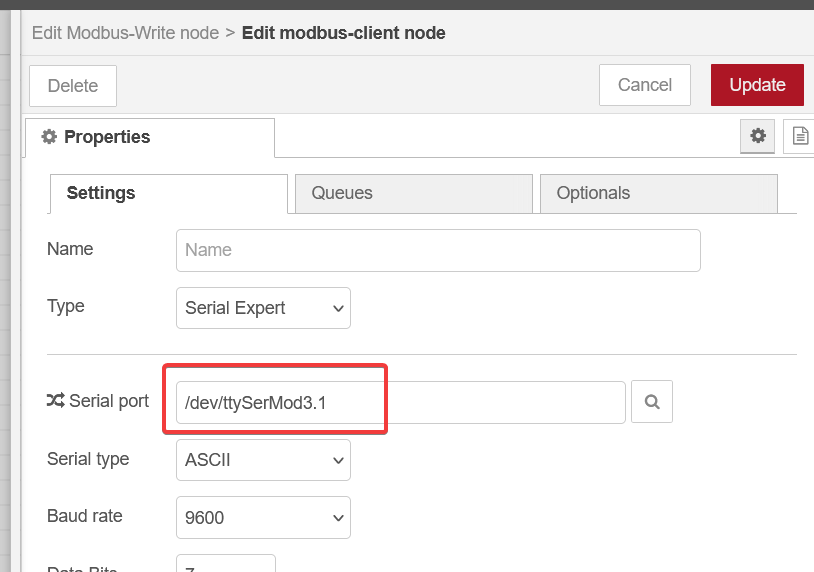
In Node-RED, setup the port name to match the name of the serial port that you noted in groov Manage:
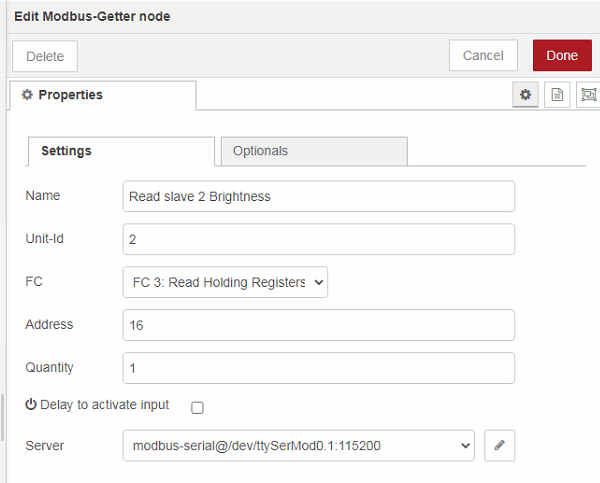
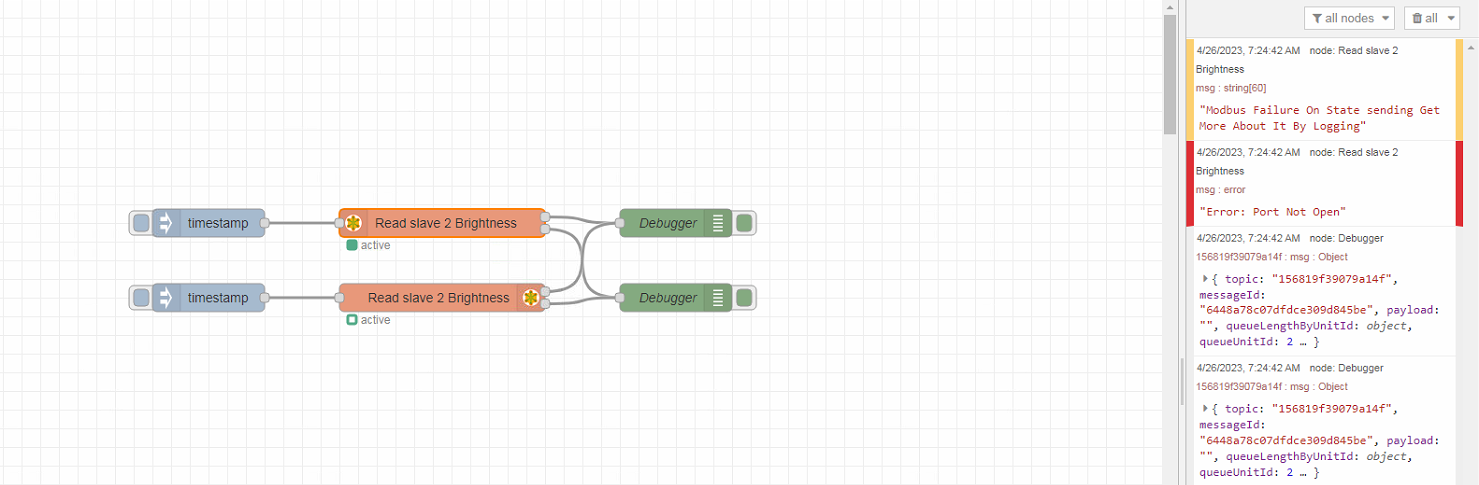
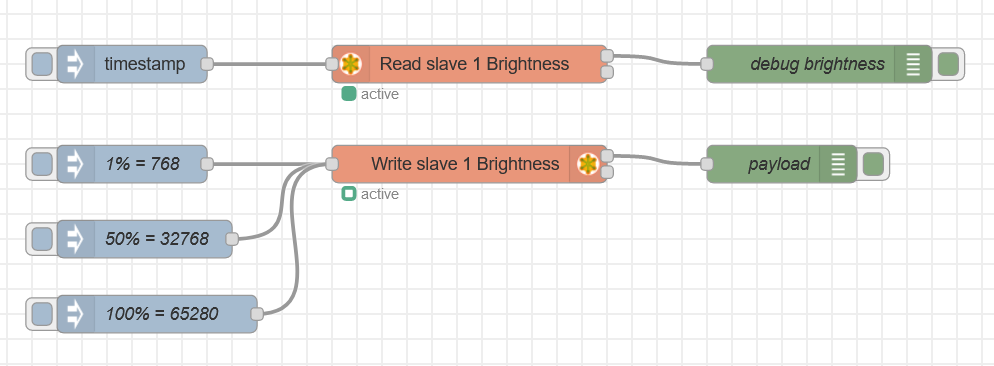
Simple flow to read the brightness every time I click the inject.
Can manual set the LED to three levels, dim, 50% and 100% by clicking each inject.
And here is the flow:
[{"id":"1ffe402ccd9d6740","type":"inject","z":"1c91b36d1147a349","name":"","props":[{"p":"payload"}],"repeat":"","crontab":"","once":false,"onceDelay":0.1,"topic":"","payload":"","payloadType":"date","x":460,"y":180,"wires":[["156819f39079a14f"]]},{"id":"67497061440a4658","type":"debug","z":"1c91b36d1147a349","name":"debug brightness","active":true,"tosidebar":true,"console":false,"tostatus":false,"complete":"payload[0]","targetType":"msg","statusVal":"","statusType":"auto","x":1010,"y":180,"wires":[]},{"id":"156819f39079a14f","type":"modbus-getter","z":"1c91b36d1147a349","name":"Read slave 1 Brightness","showStatusActivities":true,"showErrors":true,"showWarnings":true,"logIOActivities":false,"unitid":"1","dataType":"HoldingRegister","adr":"16","quantity":"1","server":"db6f9b3e.e5f338","useIOFile":false,"ioFile":"","useIOForPayload":false,"emptyMsgOnFail":true,"keepMsgProperties":true,"delayOnStart":false,"startDelayTime":"","x":730,"y":180,"wires":[["67497061440a4658"],[]]},{"id":"c3a6441edc2f8444","type":"debug","z":"1c91b36d1147a349","name":"payload","active":true,"tosidebar":true,"console":false,"tostatus":false,"complete":"payload","targetType":"msg","statusVal":"","statusType":"auto","x":980,"y":260,"wires":[]},{"id":"0f67587dc768fbad","type":"modbus-write","z":"1c91b36d1147a349","name":"Write slave 1 Brightness","showStatusActivities":false,"showErrors":false,"showWarnings":true,"unitid":"1","dataType":"HoldingRegister","adr":"16","quantity":"1","server":"db6f9b3e.e5f338","emptyMsgOnFail":false,"keepMsgProperties":false,"delayOnStart":false,"startDelayTime":"","x":730,"y":260,"wires":[["c3a6441edc2f8444"],[]]},{"id":"22acfaadee470226","type":"inject","z":"1c91b36d1147a349","name":"1% = 768","props":[{"p":"payload"}],"repeat":"","crontab":"","once":false,"onceDelay":0.1,"topic":"","payload":"768","payloadType":"num","x":460,"y":260,"wires":[["0f67587dc768fbad"]]},{"id":"7414dfb8f7e3c5ba","type":"inject","z":"1c91b36d1147a349","name":"50% = 32768","props":[{"p":"payload"}],"repeat":"","crontab":"","once":false,"onceDelay":0.1,"topic":"","payload":"32768","payloadType":"num","x":470,"y":320,"wires":[["0f67587dc768fbad"]]},{"id":"b6f37dc50ada552f","type":"inject","z":"1c91b36d1147a349","name":"100% = 65280","props":[{"p":"payload"}],"repeat":"","crontab":"","once":false,"onceDelay":0.1,"topic":"","payload":"65280","payloadType":"num","x":480,"y":380,"wires":[["0f67587dc768fbad"]]},{"id":"db6f9b3e.e5f338","type":"modbus-client","name":"","clienttype":"serial","bufferCommands":true,"stateLogEnabled":true,"queueLogEnabled":true,"failureLogEnabled":true,"tcpHost":"127.0.0.1","tcpPort":"10502","tcpType":"DEFAULT","serialPort":"/dev/ttySerMod3.1","serialType":"ASCII","serialBaudrate":"9600","serialDatabits":"7","serialStopbits":"2","serialParity":"none","serialConnectionDelay":"100","serialAsciiResponseStartDelimiter":"0x3A","unit_id":"1","commandDelay":"50","clientTimeout":"1000","reconnectOnTimeout":false,"reconnectTimeout":"2000","parallelUnitIdsAllowed":false}]
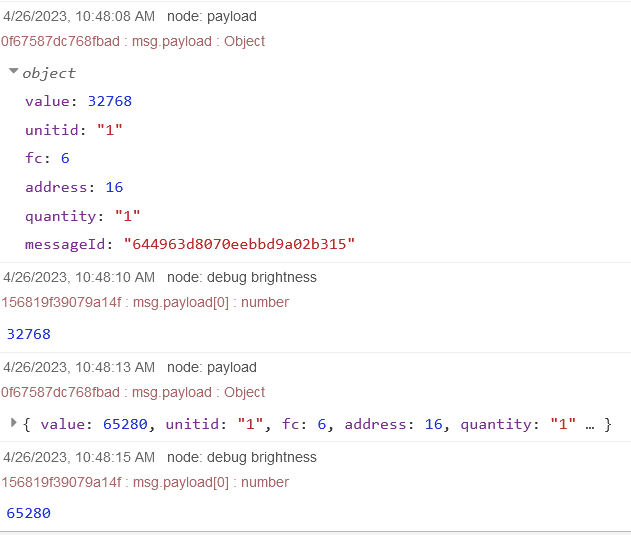
Here is the debug from setting the brightness to 50% and reading the payload and then setting to 100%.
That should get you up and running… Lets know how you get on.