I hope you read the blog I linked.
You can see that in order to display the image in groov View, the image needs to be hosted on a web server such that you can use a URL to view the image.
EPIC does not have such a web server that the shell user can access, so we need to make one, we will use Python to create a small web server for the image.
From shell copy paste each of the following lines (one at a time).
Do not proceed if any line causes an error.
Update the EPIC repo, install python-pip (you may have this already, I don’t know. Tip: do not update PIP, ignore the warning) and then install the module http which is the python web server:
sudo apt-get update
sudo apt-get install python-pip
sudo pip install http
Now we create the bash script that will use Python to make the webserver:
nano web.sh
Copy the following into the editor, save with ctrl+o, enter, then ctrl+x
#!/bin/sh

# The image path needs to be explicit.
# Image must be a JPG, BMP, PNG or GIF.
# In this example, the image is called epic.png

~/epic.png
reass=$!

killer(){
    kill $reass
    exit
}
trap killer INT

python -m SimpleHTTPServer 8888

kill $reass
Now make the script executable.
chmod 766 web.sh
Lastly, run the script:
nohup ./web.sh &
Open groov View, go into build mode, add a video gadget and add the URL for the image like this:
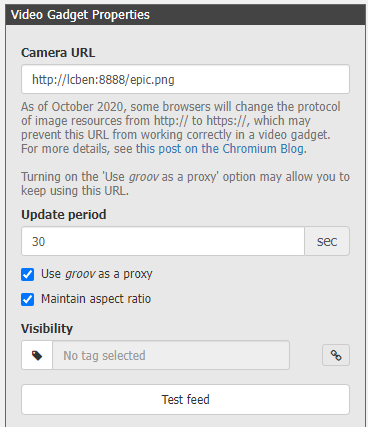
Swap out ‘lcben’ for your EPIC host name.
Please note the following VERY IMPORTANT things.
- DO NOT open port 8888 on the EPIC firewall. You do not want to expose this webs server outside of the EPIC.
- DO NOT update the image very fast. You will wear out the EPIC disk drive.
- You will need to run the web server script when the EPIC starts up, look at using crontab to do this.
- You will need to backup and restore all this work when you update the firmware on the EPIC.
Please report back how this works for you.