Hello,
I would like to allow SSH access using authorized_keys can anyone tell me how to do that. I tried to add my public key to ~/.ssh/authorized_keys but it still prompts me for a password when connecting.
Thanks,
Gary
Hello,
I would like to allow SSH access using authorized_keys can anyone tell me how to do that. I tried to add my public key to ~/.ssh/authorized_keys but it still prompts me for a password when connecting.
Thanks,
Gary
Make sure the permissions on the .ssh directory are set to 700 and the authorized_keys file is set to 600
Would be really nice if this was part of groov manage and would be preserved during firmware update, but I imagine most people don’t use it even with the increased security benefits and ease of use.
Thanks for the quick reply. Unfortunately that hasn’t helped.
That is the only change I had to make on my EPIC. You may want to check the sshd_config and verify that pubkeyauthentication is set to yes (or commented, since it is default).
Are you sure you have the public key in the correct format for the authorized_keys file?
(Basically it worked the same as any other linux box, nothing special with the EPIC)
To add to Philip’s response, I was also able to get keys working on both EPIC and RIO, but I did make a mistake with the format of the authorized_keys file (it should be one line. See below.)
For future reference, here’s exactly what I did and where I messed up to get access keys working with PuTTY running on my Windows 11 PC.
Generate the key pair on the client system (PC).
Carefully put the public key in the SSH server (groov device).
Set the client (PuTTY) to use the private key when connecting.
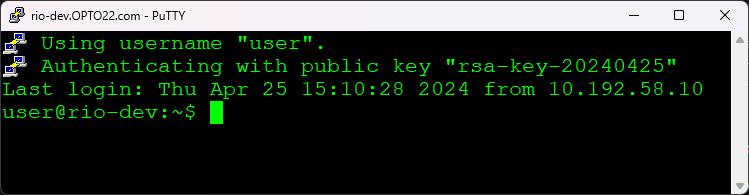
Reconnect without user/pass to confirm.
PuTTYgen, just from the start menu, it is installed along with the main PuTTY client.Leave the parameters at the bottom to the default of “RSA” and 2048 bit key size, and just click “Generate” under Actions.
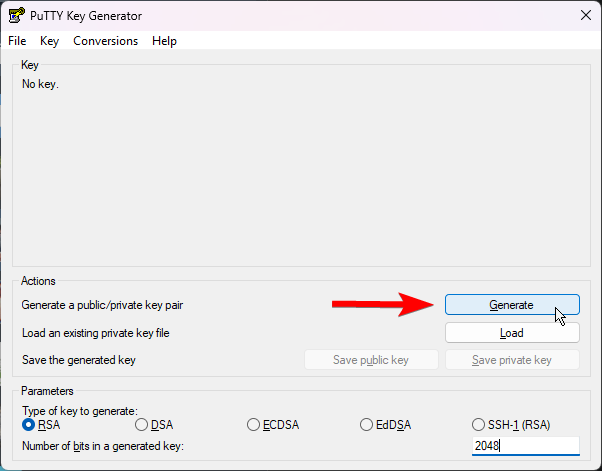
After that it’ll prompt you to move your mouse around within the “Key” area in the top half for randomness.
Once the key is generated, be sure to save the private key somewhere secure, you can regenerate the public key with it, but so can anyone else, so be mindful where you save / share it.
Don’t close this window yet!
You’ll want to add the public key to ~/.ssh/authorized_keys but you need to make sure it goes in as one line. Assuming you’re using the nano text editor, do:
mkdir -p ~/.ssh
nano ~/.ssh/authorized_keys
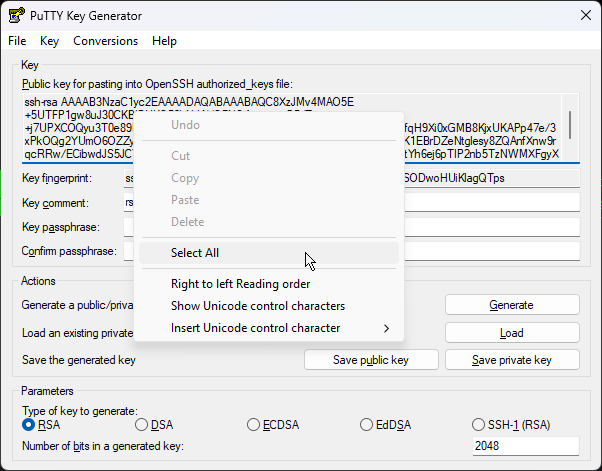
Now, go back to the PuTTYgen window and copy the entire key.
To avoid partial highlighting, right click and “Select All”, then copy.
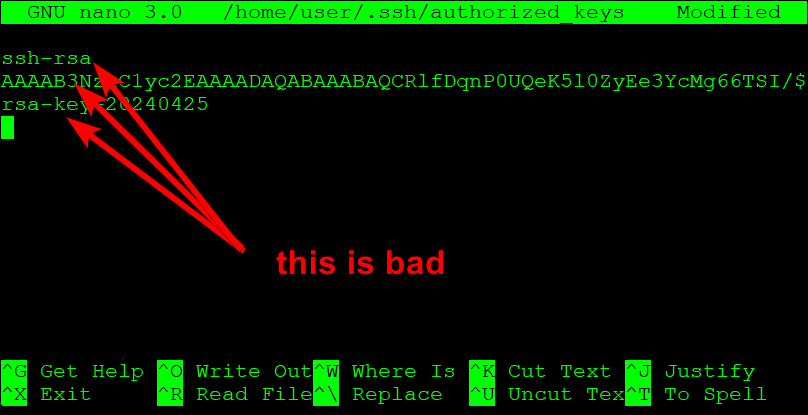
CAREFUL → Here is when I messed up.
When I pasted the key into the text file in nano, it entered them as three separate lines (this wouldn’t have happened if I had just used vim, but I digress).
Make sure you remove the newlines so you have ONE line that says
ssh-rsa <key> rsa-key-datecode
with just one space between each part.
Once that’s done, save this file, and then, to avoid the issues @philip described, here’s where you do
sudo chmod 700 ~/.ssh
sudo chmod 600 ~/.ssh/authorized_keys
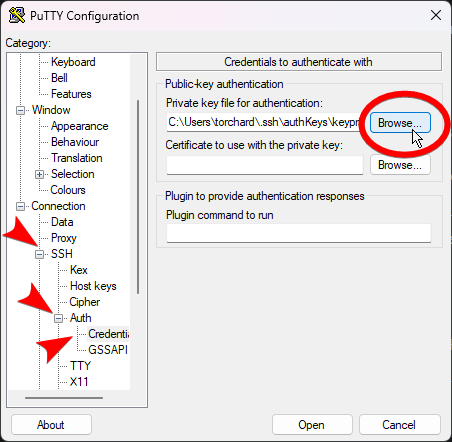
username@hostname as the hostname.On the right expand out “SSH” then “Auth” and go into “Credentials”
Click the Browse button for “Private key file for authentication”. Navigate to where you saved the *.ppk format private key in step 1 and open it.
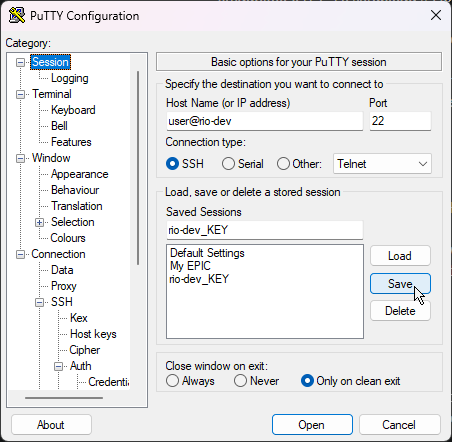
Finally, come up to the very top category, Session, give this a name under “Saved Sessions” and click save. This will remember both the username and hostname as well as the private key to be used.
Pro tip: if you use this same credential pair, and upload the public key into another device, just load this session, change the user@host, rename session, and save that copy, and you’ll be able to reuse the key without going through step 3 every time.
Bonus round, if you know how to / prefer to use Pageant, I tested it and it’ll work here.
If you don’t know what that is, don’t worry about it.
And as always, happy coding.
In my ongoing war to advocate for vim as a text editor instead of nano, here’s step 2 with vim:
mkdir -p ~/.ssh
vim ~/.ssh/authorized_keys
Then individually do:
i
shift + right click into PuTTY to paste
esc
:
x
enter
Because vim is awesome and doesn’t add the newlines like nano does.
For sure vim is horrible when you’re not used to it, the mode shifting and commands are annoying at first. But with those keystrokes exactly, you can’t mess it up!
/rant
Well its predecessor, vi is in the POSIX standard, so I believe that war has already been won. I wonder what nano users think about man page navigation?
I have this whole ritual / routine I follow every time I update my EPIC:
Only then do I feel like it’s ready to use. ![]()
Actual tip though: if you’re SSH-ing in from a Mac or Linux workstation with a relatively recent OS on it, you may need to add a bit of configuration to SSH. For my EPICs I need to add this:
Host my-pr1.local
  PubkeyAcceptedAlgorithms +ssh-rsa
  HostkeyAlgorithms +ssh-rsa
Without that it might reject your public key and prompt you for a password even if you’ve done everything else right, depending on how / when you generated your public key.
Amazing! I also fell into the nano additional line break trap.
Thanks for the tip, pubkeyauthentication was indeed commented out.
The default is enabled, so commented out is acceptable.