An integrator had:
A. Some Modbus master (not sure if it was hardware or software, but it was TCP)
B. One of our hardware PACs
C. Another device that connected via serial (which happened to be communicating via Optomux, but that’s not particularly relevant to this example). The important part was that the PAC could communicate with it, and as you know, PACs and communicate with a whole lot of things–including websites on the Internet which is super fun, but I digress…
They wanted to connect A through B to C, and figured there was a way, but didn’t know exactly how to connect the dots.
What to do?
My answer: Mem Map Scratch Pad + built-in Modbus support
First: they got data moving between B & C (in this case, using a simple Optomux example found here).
Next step: put the data into the scratch pad, such as the first of our gazillion Scratch Pad Integers which you can also access via PAC Manager like this:
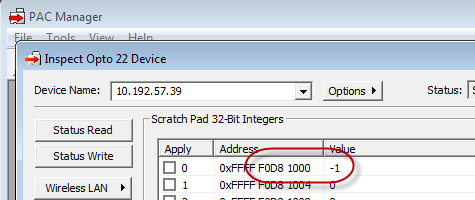
This data is already accessible via Modbus (like the ModScan32 client pictured below, or whatever this customer had for A.). That’s because just about anything in your SNAP-PAC-S or –R series controller’s memory map has a built-in Modbus address too. You just need the “secret decoder ring” to convert the mem map address to the Modbus address.
To access the address converter shown below, in PAC Manager, choose: Tools > Modbus Calculator. Type in the MemMap Address there in the bottom left then click the right arrow to get the “Unit ID” and “Register Address” and ta da! PAC Manager does the math.
Here’s an example, using this scratch pad mem map address.
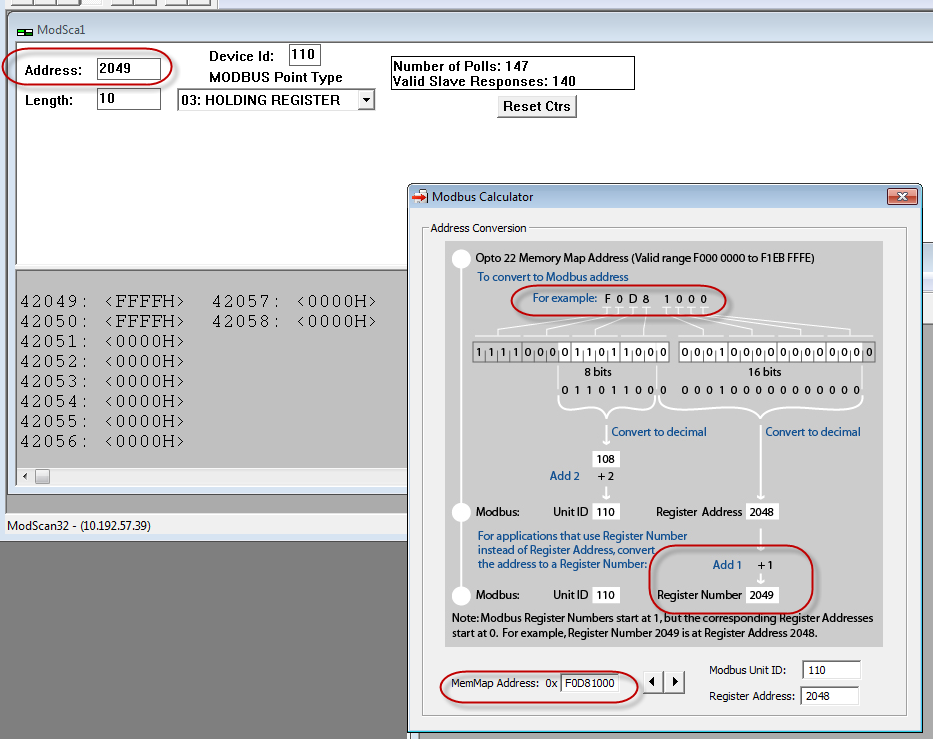
Note: sometimes you have to add one to the calculated number, as shown in the circles above.
Once you’ve tested using a Modbus test client like the one shown, and PAC Manager, your “glue” is all ready to go. Neat-o!
-OptoMary